For your security and convenience we are providing all clients with a personalized client portal, through Box. Below you will find instructions for setting up your client portal. Most of the steps below will only need to be done during this initial set up phase. Once you have set up your client portal you will be able to share and collaborate with our team in a convenient and secure manner.
**Recommendation: Please complete these steps below on a computer for full functionality.
Box.com supports both Windows and MacOS.
(For the best experience, we recommend using Google Chrome, Microsoft Edge, Firefox or Safari when accessing the Box.com website)
Box Step-by-Step Instructions
Step 1: Please accept the email invitation from noreply@box.com to collaborate with us in your client portal folder. (If you do not see an email from HeimLantz CPAs and Advisors at noreply@box.com, please check all email inboxes for the invitation link including SPAM)

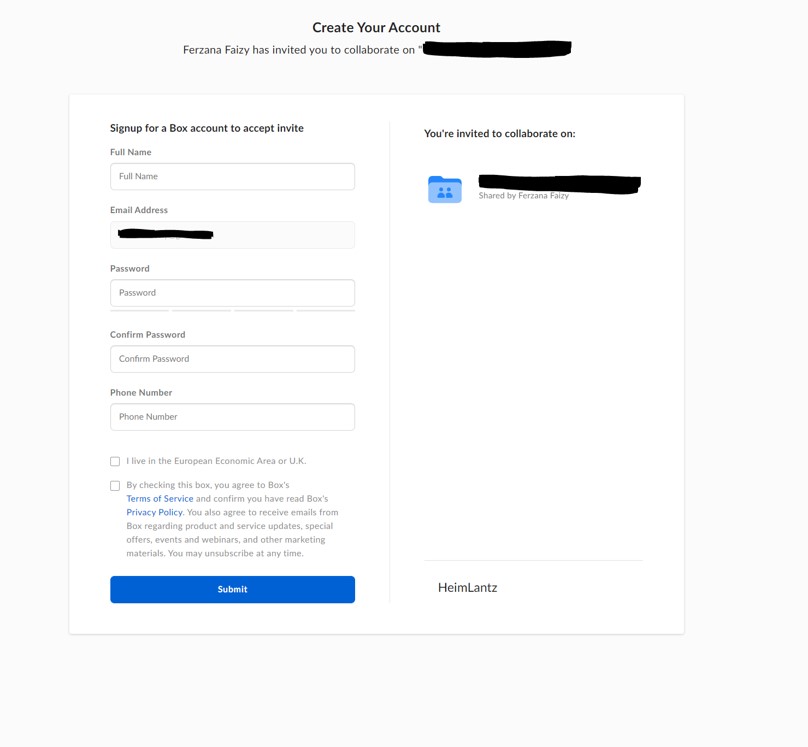
Step 2: You will be asked, to create a free Box account. Fill in all required fields, then read and accept Box’s Terms of Service and click “Submit.” (If prompted, please select “Not a part of Heimlantz Organization”).
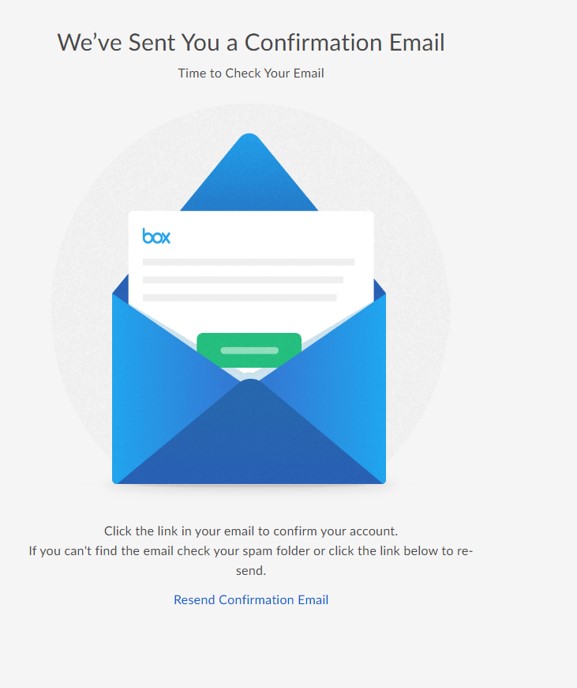
Step 3: Box will send you an email link to confirm your account setup, please check your email for the confirmation link, before proceeding. (Please check all inboxes including Spam and Junk for an email from noreply@box.com)
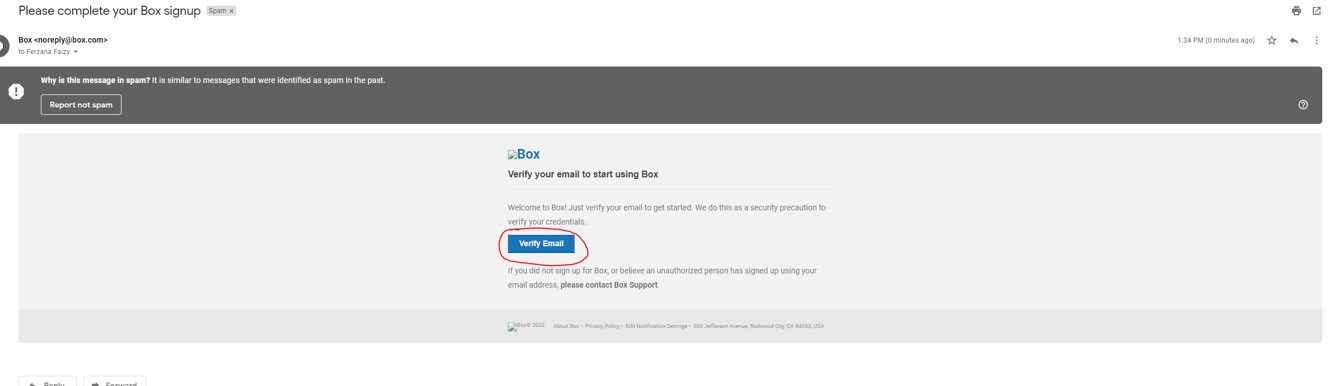
Step 4: To complete the setup of your Box account. Please click on “verify your email.”
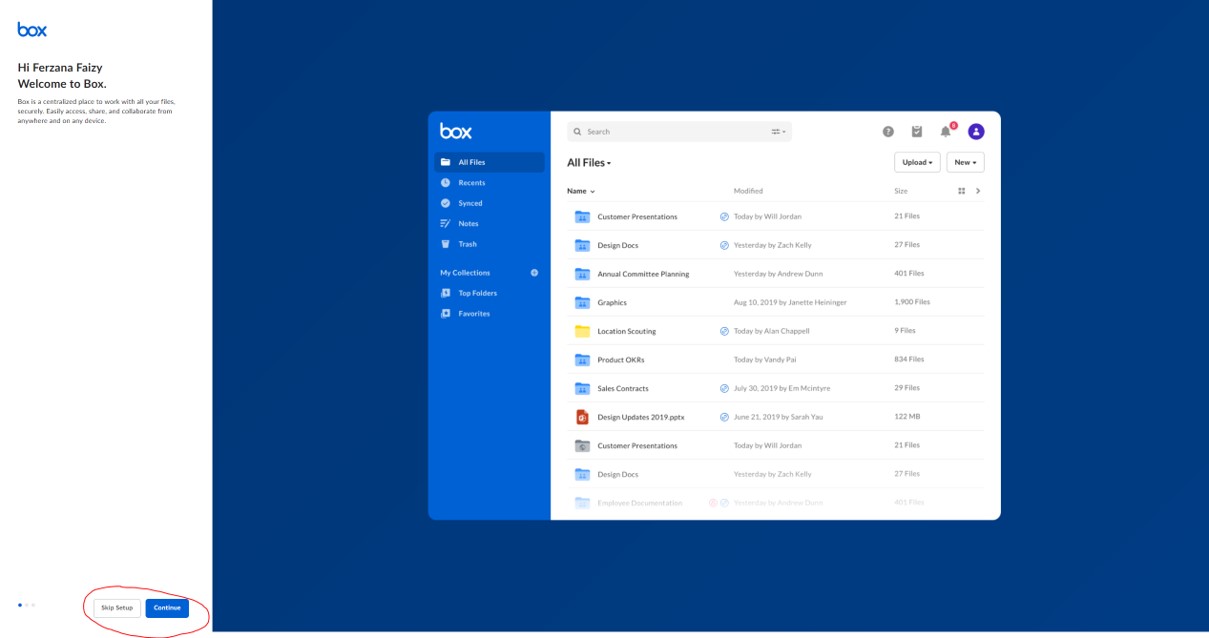
Step 5: Once you have verified your email, a “Welcome to Box” window will appear. This will just take you through the welcome process. Please either click “Skip Setup” or “Continue”.
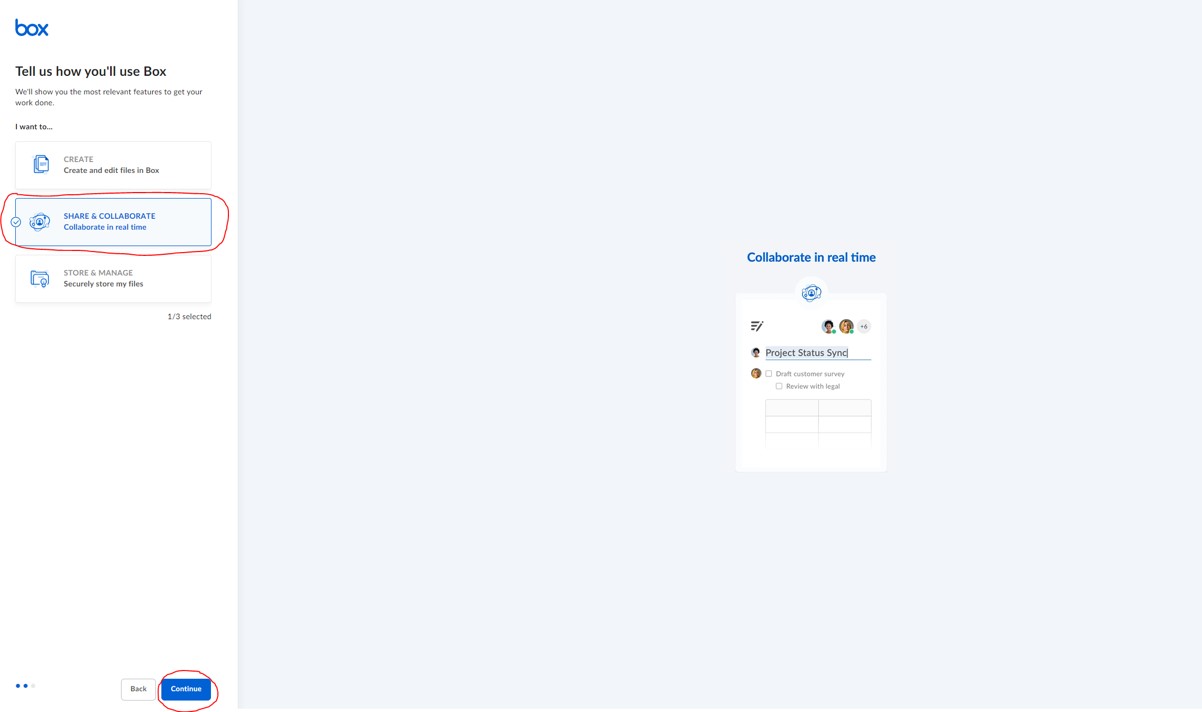
Step 6: As you go through the welcome process, you will be asked how you will use Box, please select “Share & Collaborate” then click “Continue.”
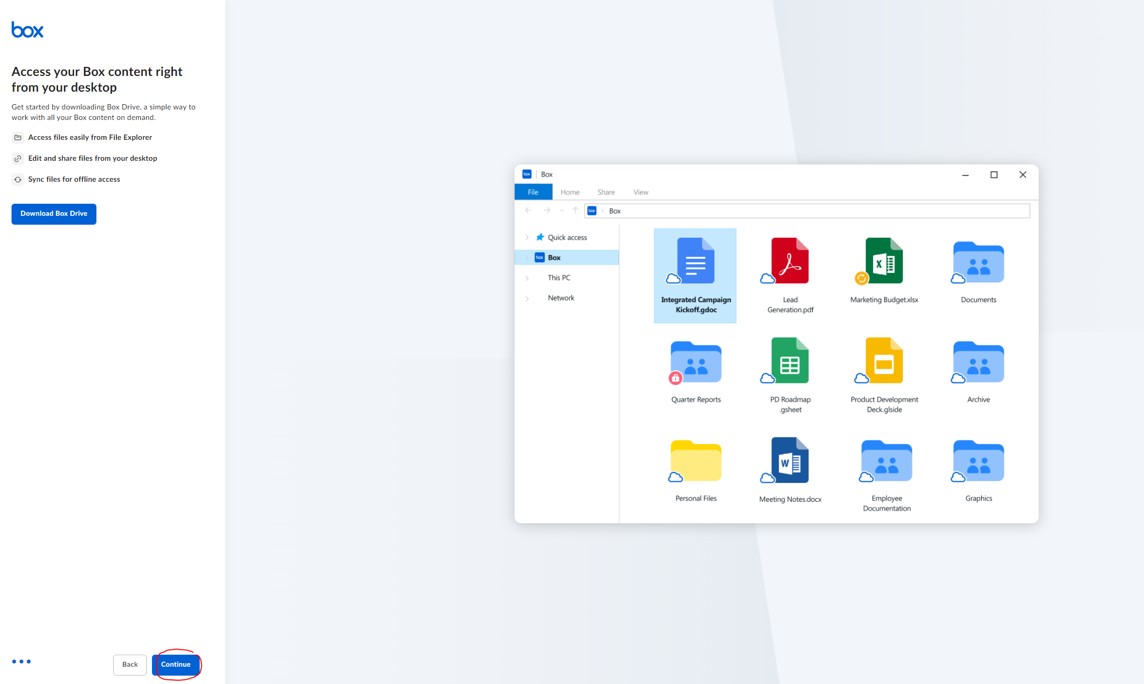
Step 7: On this screen you will disregard the download of Box Drive and click “Continue.” You will proceed with Box online version.
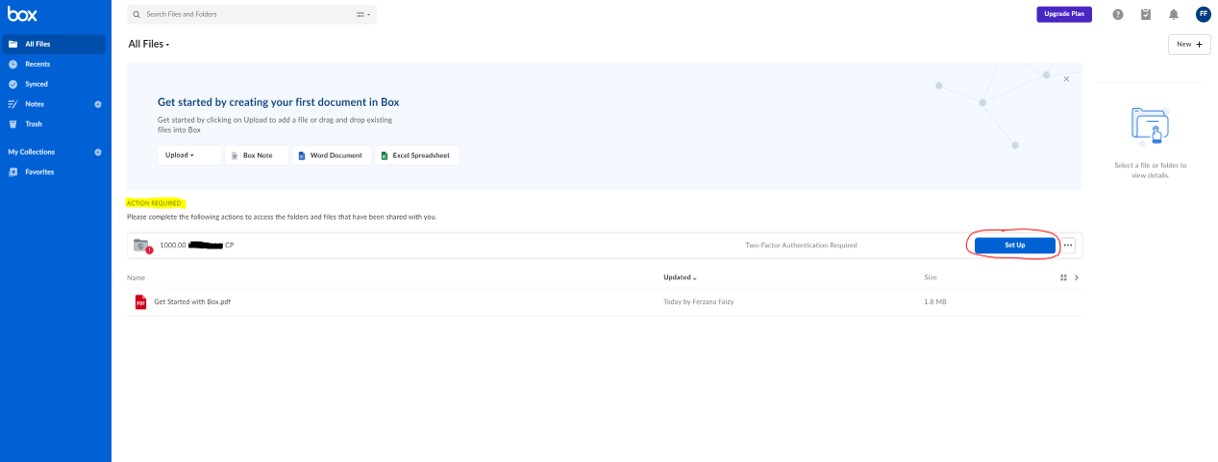
Step 8: Once you have setup the account and successfully logged into your Box account, you will see a folder titled with your “Client ID Client Name CP” and an “Action Required” notification. Please navigate to the right of the folder and click “Set up” to proceed with the two-factor authentication. This step is required in order for us to securely exchange documents with you.
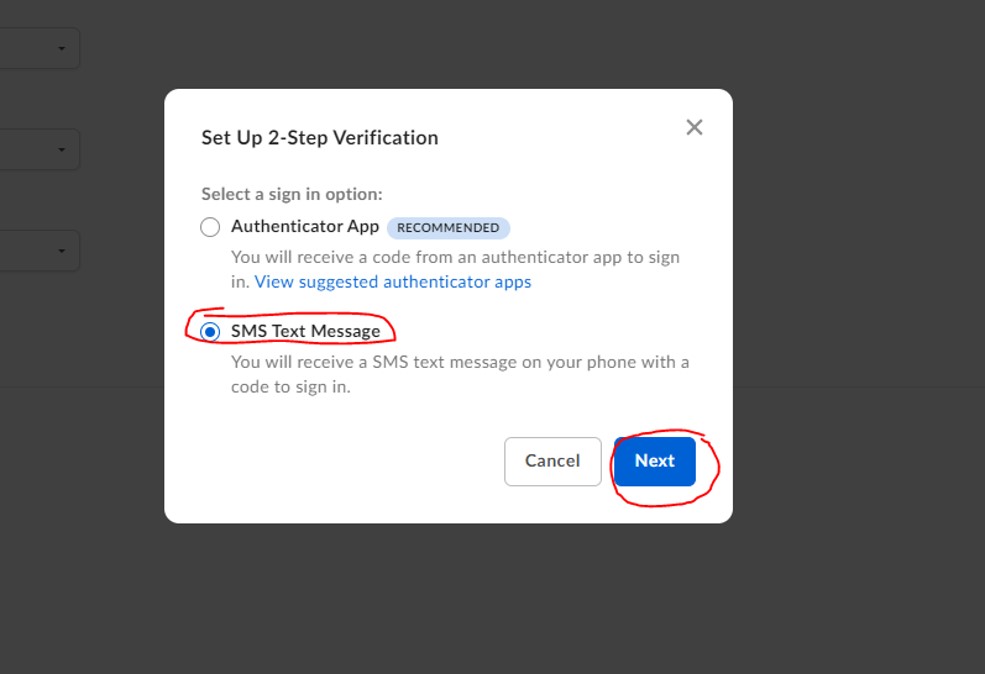
Step 9: Once you have clicked on “Set up”, you will now be prompted to select an option for the 2-Step Verification. Please select the second option, “SMS Text Message.” Then click “Next.”
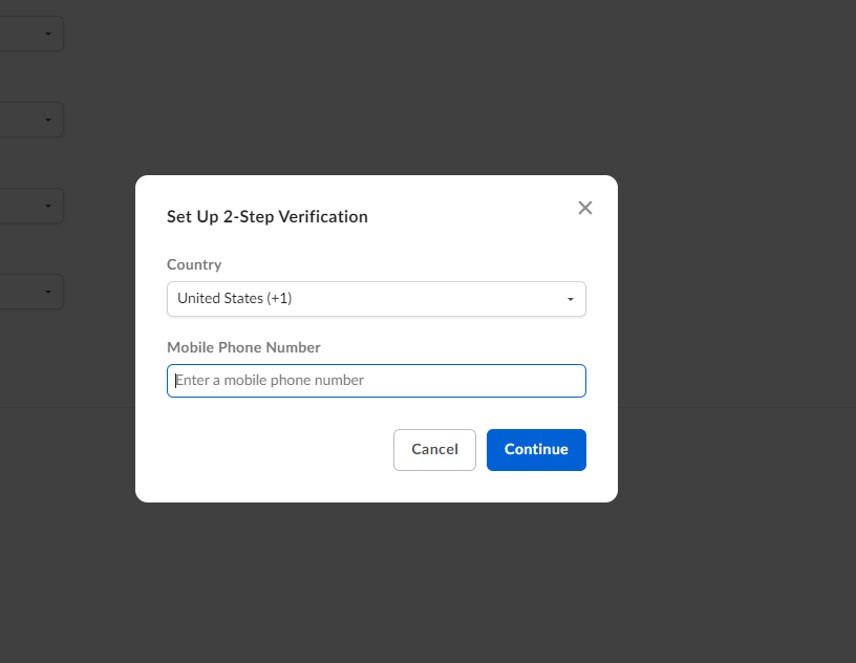
Step 10: You will be required to enter a mobile/cell phone number that you have access to. This is only a one-time request; you will not be prompted to complete this at each log in session. Please enter a mobile phone number with an area code (without dashes or hyphens), then click “Continue.”
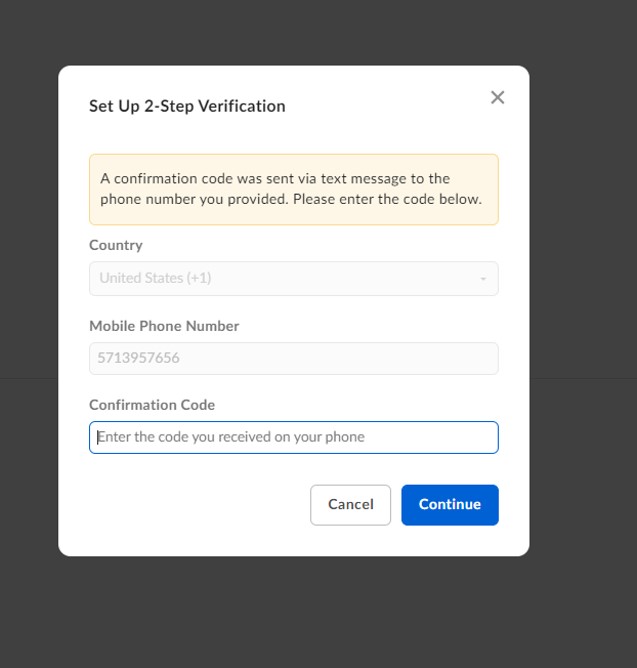
Step 11: A confirmation code will be sent to the mobile phone via text message. Please enter the confirmation code provided to you in the required field, then click “Continue.”
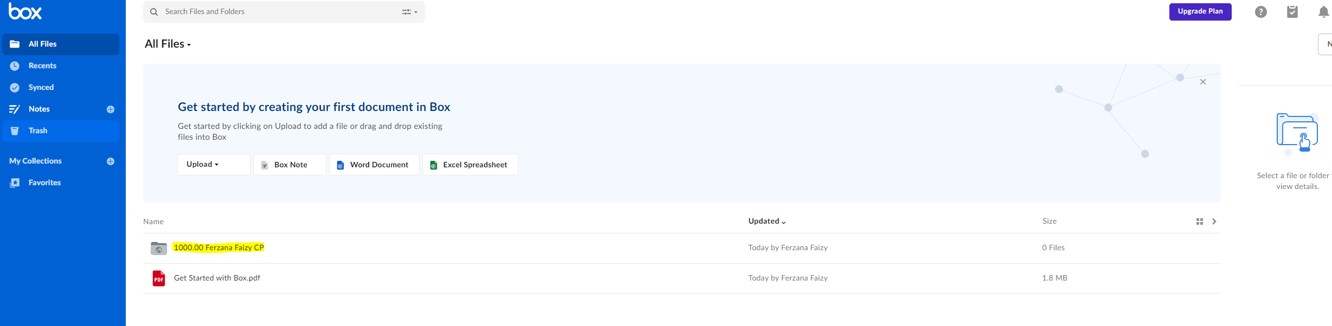
Step 12: You should now see your client portal folder in “All Files”. Please double click onto the folder titled with your “Client ID Client Name CP”, as highlighted below, and proceed with uploading documents requested by your accountant. Please make sure to share files only within the folder labeled with your Client ID Client Name CP (it’s colored gray to indicate it is shared). You can create any personalized sub folders within this main folder, but any folders created, or documents uploaded outside of the Client ID Client Name CP folder are not visible to our team.
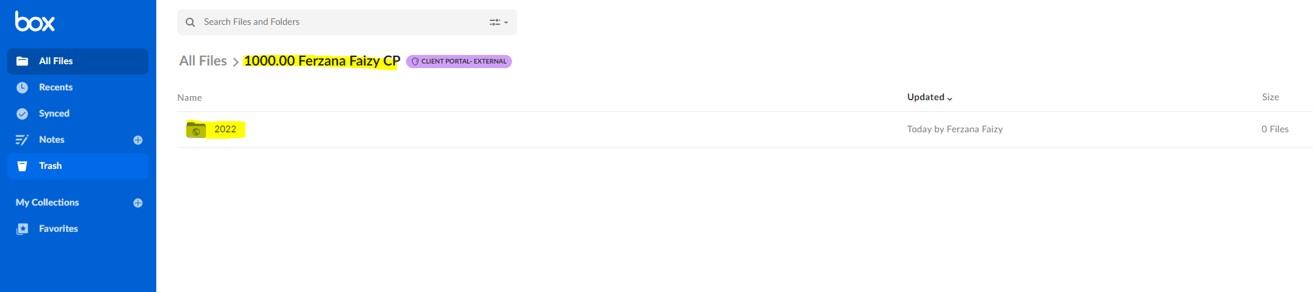
Step 13: Once you are inside of your client portal folder, you will see a subfolder titled either by current year or tax year, as highlighted below. Per you accountant’s request, please upload the files into the applicable subfolder by double clicking onto the folder.
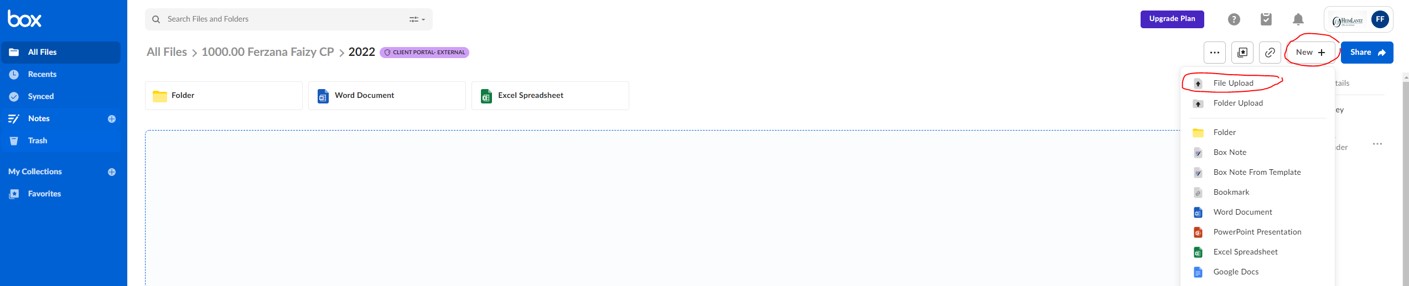
Step 14: To upload files, navigate to the right of your screen and locate “New +.” Click on “New +” and select “File Upload” from the drop-down list. This will prompt you to open your computer’s files and folders. Please upload the necessary documents. Or you can simply drag and drop files into the “White Boxed” area in Box from your files on your computer.